Maze books are fun and easy to make.... it’s almost magical to see
16 pages appear from a single piece of paper!
16 pages appear from a single piece of paper!
Materials:
- 12” x 18” white construction paper
- Scissors
- Card stock or heavy-weight paper, cut to 4 3/4” x 6 12”
- Ribbon or raffia, about 2 feet per book
- "YES! Paste" (or Avery Permanent Glue Stick)
- 1” foam brush for spreading paste
- Pencil, markers, etc. for illustrating or writing
Directions:
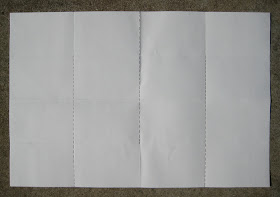
- Fold your paper in half length wise, then open it up and fold the edges back into the middle. You should have four long sections.
- Now repeat step #1 by folding your paper the other direction. Now you have 16 sections.

- With your paper laid horizontally in front of you, cut along the first vertical fold (closest to the left side of your paper) starting at the bottom and going 3/4 of the way to the top.
- Then move across to the vertical fold that is closest to the right side of your paper and cut along that fold from the bottom 3/4 of the way to the top.
- Next, cut the middle fold from the top of your paper 3/4 of the way to the bottom.
- Now it’s time to fold your book! Begin at one end and start folding your paper back and forth, accordion-style, until you reach the other end. You have made a “signature”, a group of pages that make up a section of a book.
- Fold card stock in half to make your cover.
- Spread a line of paste horizontally across the middle of the inside of your cover and lay the ribbon across it.
- Then spread paste on the top of your signature and place it over the ribbon, on the inside left of the cover.
- Next, spread paste on the back of your signature and place it over the ribbon, on the inside right of the cover.
- Fold the cover closed and lay something heavy on top until the paste has had time to dry.
Try these fun extensions....
- Start with a square (like 12” x 12”) and follow steps #1 - #6 to make a square book.
- Try turning your rectangular paper vertically before you cut it (see steps #3-5) to make a book that is wider than it is tall.
- Cut some of your pages half way down on the fold and then fold them down to make handy little pockets.


we made one for our owl week! Hope you love it! thanks for sharing
ReplyDeletehttp://pandielleando.blogspot.com/2012/01/blogueros-invitados-semana-del-buho.html
Very nice, Yolanda! The velcro closure is a great idea... I never thought of that!!
ReplyDeleteI am a Kindergarten teacher, and a middle school art teacher at a very under-funded private school in inner-city Washington DC called Cornerstone. I am constantly searching for economical lessons that will inspire these kids, some of which have never been exposed to art at all. I love the ideas on your site. This book idea looks great. I am a bit confused at how you go from the cut paper to the accordion style folded paper. What is the role of the cuts in the paper. I am sure I am missing something fairly obvious. My left-brain isn't working for me apparently. :) Thanks in advance.
ReplyDeleteCaitlin, I can see how it could be confusing trying to follow written instructions for this.... a quick video would explain it so much better! Maybe someday, but til then, if you align your paper (after making the cuts) with the photo where I drew the dotted fold lines, just start at the lower left corner and do the back and forth accordion fold and just keep going up the left side, around the upper left corner, down the next column, and so forth.... all the way around til you get to the lower right corner. Try that and let me know how it goes! God bless you for bringing art to those kids!!
ReplyDelete