 |
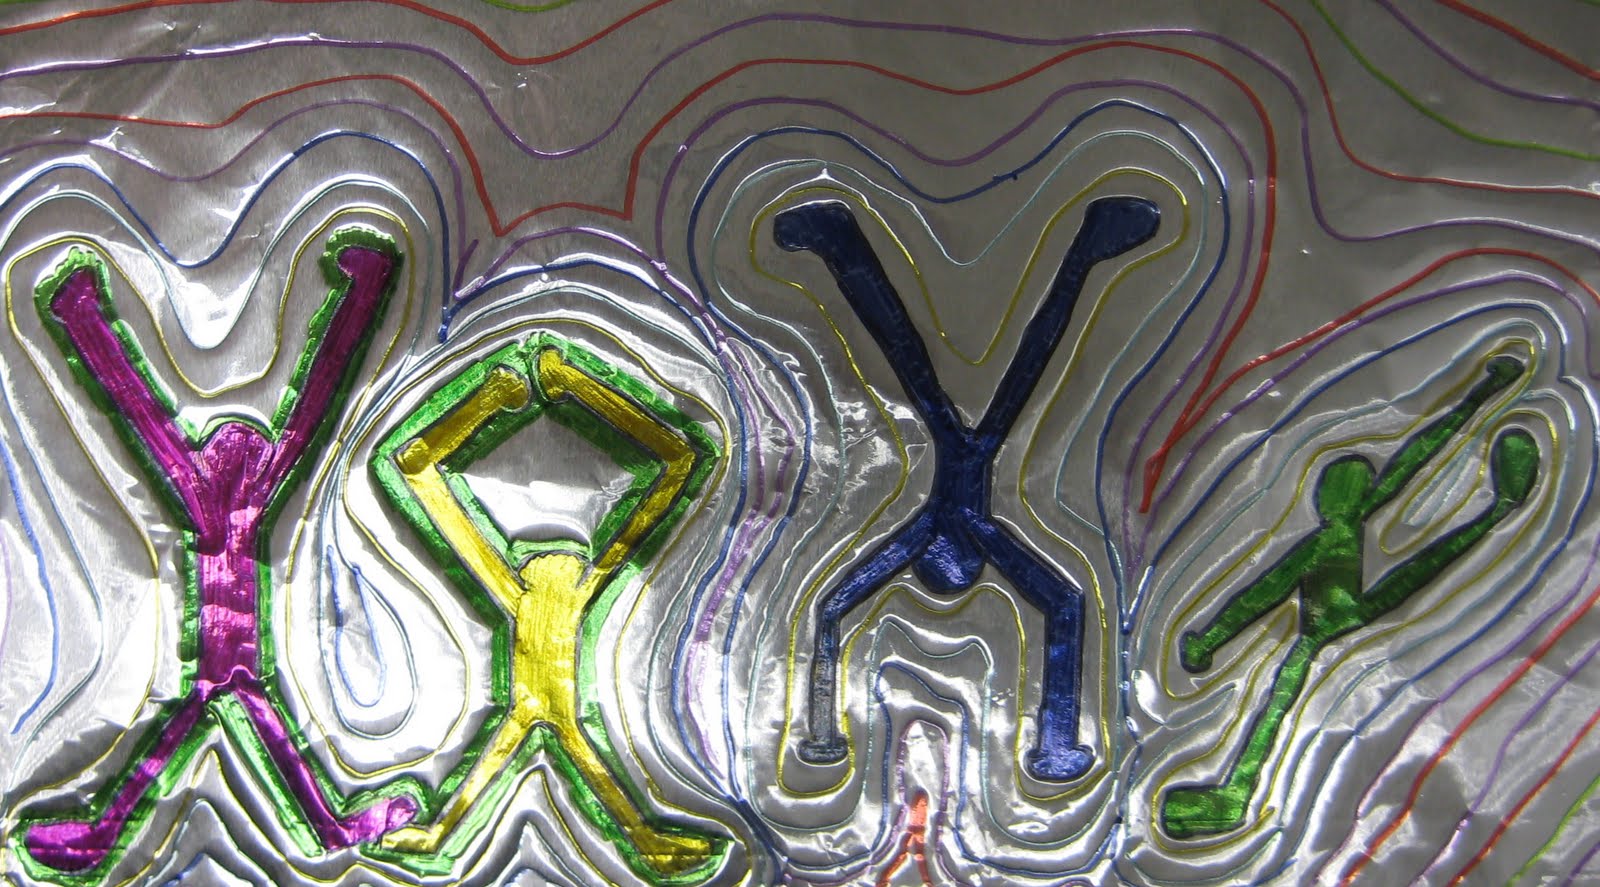
| I found my inspiration for this lesson at Deep Space Sparkle. It's the end of the school year, and while this project looks fantastic on regular white paper, I needed to go a step further to really grab my 6th graders' attention! So, I created my sample on aluminum foil with colorful Sharpies. The result.... my students said this was their favorite art project this year! |
Keith Haring (1958-1990) was born and raised in Pennsylvania. He made his debut as an artist at age 19 with his graffiti-inspired chalk drawings in the subways of New York City. He became known for his "Pop Art" style of active, simplified figures, bold outlines and bright colors. He died at age 41 from complications of AIDS.
Materials:
- Cardboard or tag board (We used file folders - opened, cut on the fold and trimmed to a rectangle.)
- White paper the same size as your cardboard
- Heavy duty aluminum foil, slightly larger than your cardboard
- Tape (any kind)
- Pencil
- Sharpies (or other permanent markers), in a variety of colors
1. On your paper, draw 3 or more large stick figures in action poses.
2. Draw an outline around your stick figures to create some "Keith Haring-like" people.
3. Cover your cardboard with aluminum foil, taping the foil to the back.
4. Now tape your drawing to the front, on top of the foil.
5. Trace over your drawing with pencil, leaving an impression in the foil.
6. Carefully remove your drawing.
7. Next, use a black Sharpie to outline your figures on the foil.
8. Fill in the figures with solid, bright colors.
9. Finally, add "echo lines" around each figure, varying the colors, thickness and types of lines. Keep adding more echo lines until you've filled in all of the negative space around your figures!


Great project to illustrate the work of Keith Haring.
ReplyDeleteI love the colors and patterns
wow, the foil really brings new life to the keith haring figure lesson - i will try this too. thanks for sharing!
ReplyDeleteI love this idea! Your site has inspired me to do more art projects with my son and to teach him about great artists and their work (as a person with a B.A. in art history, I'm ashamed I didn't think of that sooner). Thank you so much for sharing!!
ReplyDeleteHow cool are those?
ReplyDeleteThis is a great lesson! I have nominated you for Versatile Blogger award. Please see my blog to accept your award. http://artexplorium.blogspot.com/2011/05/versatile-blogger_30.html
ReplyDeleteJust curious if you used tooling foil for this project? Or regular cooking aluminum foil? Love the look!
ReplyDeleteJust regular old heavy weight aluminum foil!
ReplyDeleteWow, just found your blog!
ReplyDeleteI'm amazed! New follower here!
Ilse at
http://artlessonsfrombelgium.blogspot.com/
Volkswagen Passat Turbocharger
ReplyDeleteits nice to read a useful article for beginner like me. Some of points from this article are very helpful for me as I haven’t considered them yet. I would like to say thank you for sharing this cool article. Bookmarked and sharing for friends.